
Keep a small reference image on screen while you work: capture it with Snip Capture, choose Pin, and place it beside the document or app you are using. You can move the pinned image and resize it with the mouse wheel.
This is useful when you need to copy a few details from a receipt, compare a design with a reference, or follow instructions on a small laptop screen. You keep the relevant part visible without giving an entire browser window half your desktop.
Open Snip Capture
Install Aelrox for your computer, launch it, then open the Snip Capture page. Choose Open in Aelrox and follow the installation and permission prompts.
Screen access lets the tool capture the region you select. If you need help with the browser-to-desktop step, follow the Desktop App Guide.
For a first attempt, use a short block of reference text or an image without personal information. Open the document you want to work in alongside it.
Capture just the reference you need
- In Snip Capture, choose New screenshot.
- Drag around the part you want to keep visible. Keep the selection small enough to fit beside your work.
- Confirm the selection to open the captured image in the editor.
You can also hover over a window and click its detected boundary. If the selection keeps snapping to a window when you want a smaller area, hold Alt while making the selection. Press Esc to cancel a capture.
The result is a still image. If the original page changes, the screenshot will not update with it; take a new capture when you need fresh information.
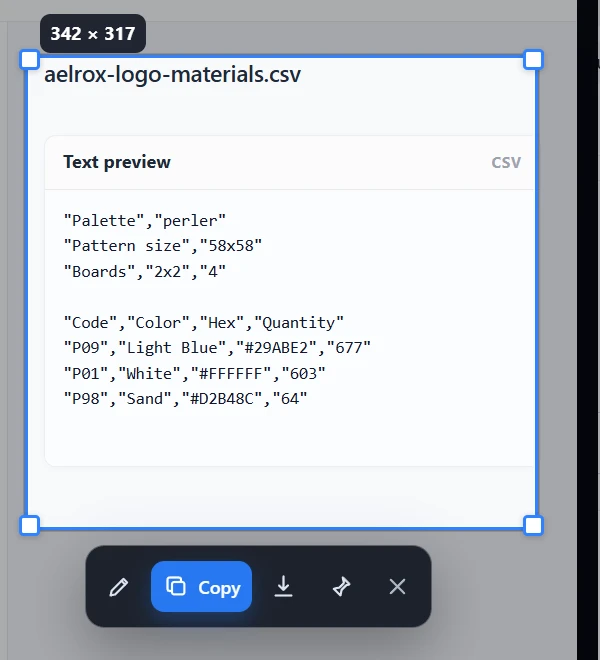
A real region selection around the materials CSV preview. The toolbar below the selected area contains the annotation, Copy, Save, Pin, and Close controls.
Add a useful mark, then pin the image
The editor includes pen, arrow, rectangle, ellipse, text, and mosaic tools. For a reference image, one arrow or a short note is often enough. Undo and redo let you revise your annotations before using the result.
Choose Pin to keep the image above other windows. Pinning retains the captured region's position and size, so you can start with the image where the original information appeared, then move it somewhere more convenient.
Use Pin when you want the image to remain on screen. Copying is a different action: after a successful copy, the transient editor closes. You can then paste the copied image into another app, but that does not create a desktop pin.
Arrange it around your work
Drag the pinned image to move it. Move the pointer over the image and use the mouse wheel to resize it around the pointer. Keep enough detail visible to read the reference without covering the field or canvas you are editing.
A practical arrangement is to put a narrow reference image near the part of the document you are changing. Once you have copied the information or completed the comparison, use the floating toolbar to unpin or close the image. Unpinning returns you to the editor.
If you need a copy after the task is finished, use Save as from the editor. A temporary reference and a saved file serve different purposes; save anything you want to keep.
Make the next capture quicker
Snip Capture suggests Ctrl+Shift+A on Windows or Cmd+Shift+A on macOS as a capture shortcut. It is disabled until you enable it in Settings → Shortcuts. Check for a conflict with another app before assigning it.
The toolbar workflow also works without a global shortcut, so you can complete your first capture before changing keyboard settings.
Know the current limits
Snip Capture 1.8.0 supports region capture, annotations, copying, saving, and a movable pin. It does not currently provide OCR, scrolling screenshots, capture history, or multiple simultaneous pins.
For a long webpage, select the section you actually need as a reference. For editable text, return to the original document rather than expecting the screenshot to extract it.
Open Snip Capture and try keeping one small reference above your work. If you need to show a sequence of actions instead, see how to record and trim a desktop demo.