Use Perler Bead Pattern Generator in Aelrox to turn an image into an editable fuse-bead grid, correct individual cells, and export both a pattern PNG and a materials CSV. Save the project as well if you want to return to the editable design later.
For a first pattern, choose a small image with a clear silhouette and a few distinct colors. A simple flower, heart, or original pixel character is easier to evaluate than a photograph full of tiny details.
Open the pattern generator
Install the Aelrox desktop client, then open Perler Bead Pattern Generator and choose Open in Aelrox. The tool uses a file picker for your source image and save dialogs for its output.
Keep the original image separately. The editable project, exported pattern, and materials list are three different files with different purposes.
Choose the image, grid, and palette
Select Choose image and open your picture. Set the pattern width using the grid-size control, then choose a palette.
Version 5.0.0 includes these options:
| Palette | Available colors |
|---|---|
| Perler Basic | 20 |
| Hama Midi | 14 |
| Art Grayscale | 9 |
These are limited palettes, not complete manufacturer color catalogs. Check the actual beads you own before committing to a design. Screen colors are a planning aid, not a guarantee of a physical bead's appearance.
A larger grid can retain more detail, but it also creates more cells to assemble. Start small enough to inspect the entire pattern. Look at the outline and the features that make your image recognizable before increasing the size.
The Dithering option can break gradients into patterns of available colors. Compare the result with dithering on and off: smoother shading may be useful for a photograph, while a simple pixel drawing may be easier to follow with clean blocks of color.
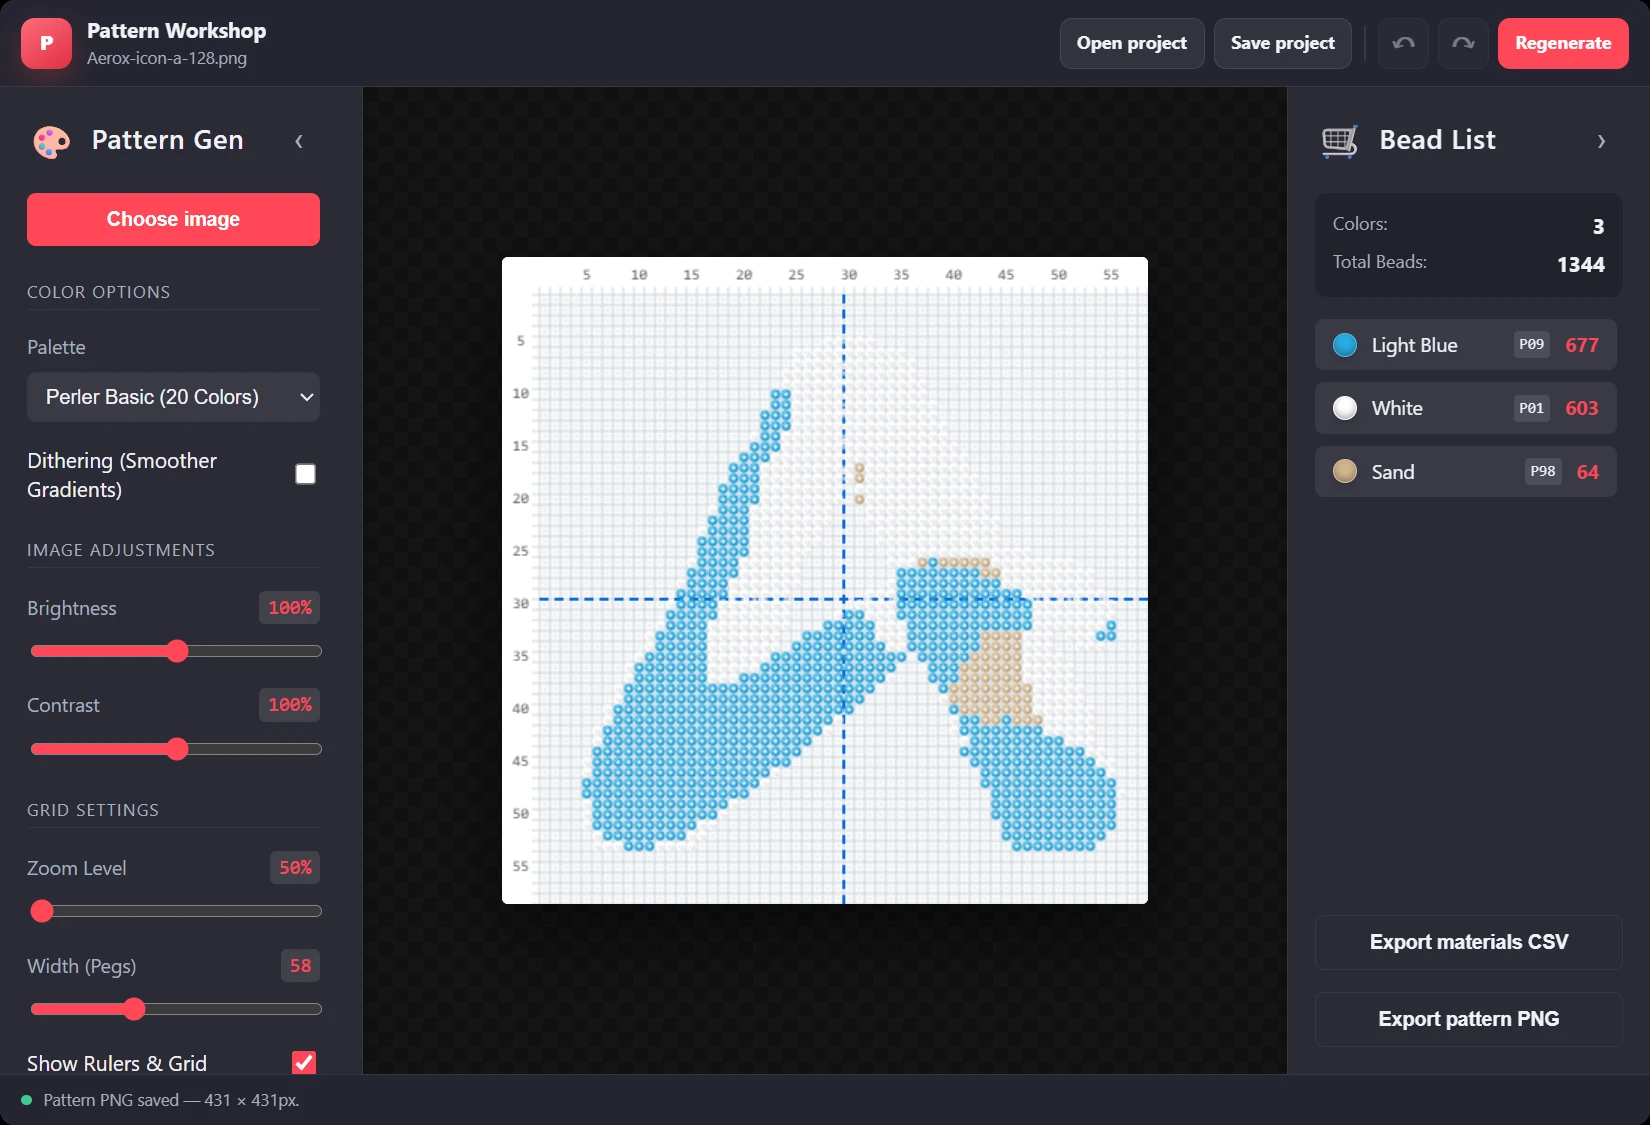
The Aelrox icon imported in the Windows client: a 58 × 58 grid, the Perler Basic palette, and 50% zoom. The material counts are 677 light-blue, 603 white, and 64 sand beads, totaling 1,344. These counts were also checked in the exported CSV.
Correct the generated grid
Inspect the pattern before exporting. Look for isolated colors, gaps in an outline, and small details that disappeared during conversion.
Use the editing tools to paint individual cells with a selected palette color or erase cells that should be empty. Undo and Redo let you compare a correction with the previous version.
Make generation changes before spending a long time on manual cleanup. Regenerate replaces the current pattern and its edits; save a project before trying a substantially different grid or palette.
Check the bead list
The Bead List groups the non-empty cells by color and shows the total bead count. After a manual edit, use the list to check whether the change affected the quantity you expected.
For example, replacing one red cell with a blue cell should reduce red by one and increase blue by one without changing the total. Erasing a filled cell should reduce the total. These are useful checks on your own pattern, not measurements from a supplied sample.
The counts describe the design. Add any spare beads you want for your physical project separately; the software's cell count is not an allowance for lost or damaged pieces.
Export the files you need
Choose Export pattern PNG to save a picture of the pattern. Open the saved file to make sure the grid and colors are legible at the size you intend to use.
Choose Export materials CSV to save the materials table. It includes palette and pattern information, a board-layout summary, and rows with color codes, names, HEX values, and quantities. Open it in a spreadsheet to compare those quantities with your supplies.
The CSV is a materials list; the PNG is the visual guide. Keep both with the same project name so you do not accidentally pair a new pattern with an old list. If you edit the pattern after exporting, export both again.
The current pattern export is PNG, not a print-ready PDF. Before printing, inspect the image and print preview rather than assuming a particular physical scale.
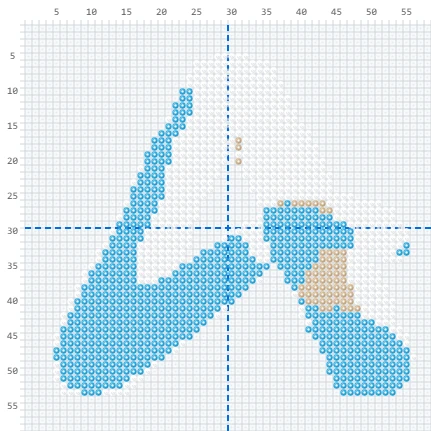
The actual 431 × 431 PNG exported from this example, rather than a mockup of an expected output.
Save an editable version
Use Save project to keep the pattern in the application's project format. Later, choose Open project to continue editing it. A PNG alone does not preserve the same editable project information.
Before putting the work aside, reopen the project file you saved and confirm that the grid and your corrections are there. Then keep the project, PNG, and CSV together.
Open Perler Bead Pattern Generator and start with one small image. The first useful result is a readable pattern with a materials list you can check against your own beads.