A raw screenshot explains what your app does, but a framed image can work better in an announcement or project update. You want a consistent background and a simple device frame without rebuilding the image in a design editor.
Grid Studio's Mockup mode places a selected image inside a stylized device or browser frame and exports one picture. It is a presentation image, not a running version of the app inside the frame.
Start with a readable screenshot
Capture the app in a useful state: a completed task, a clear example or an uncluttered starting screen. Remove private names, account details and unrelated windows before importing it. Keep the original screenshot for tutorials where readers need to inspect small text.
Open Grid Studio in Aelrox. Select Mockup, then + Add photos, and choose the screenshot. If several images are loaded, select the thumbnail you want to display.
Pick a frame that suits the screenshot
Choose Laptop, Desktop display or Browser window for a desktop screenshot. Phone-style and tablet options suit differently shaped source images; putting a desktop screenshot inside a phone does not demonstrate that the app runs on that phone.
Our example uses a real File Compare screenshot from a Markdown comparison, the Laptop frame and Fit full photo placement.
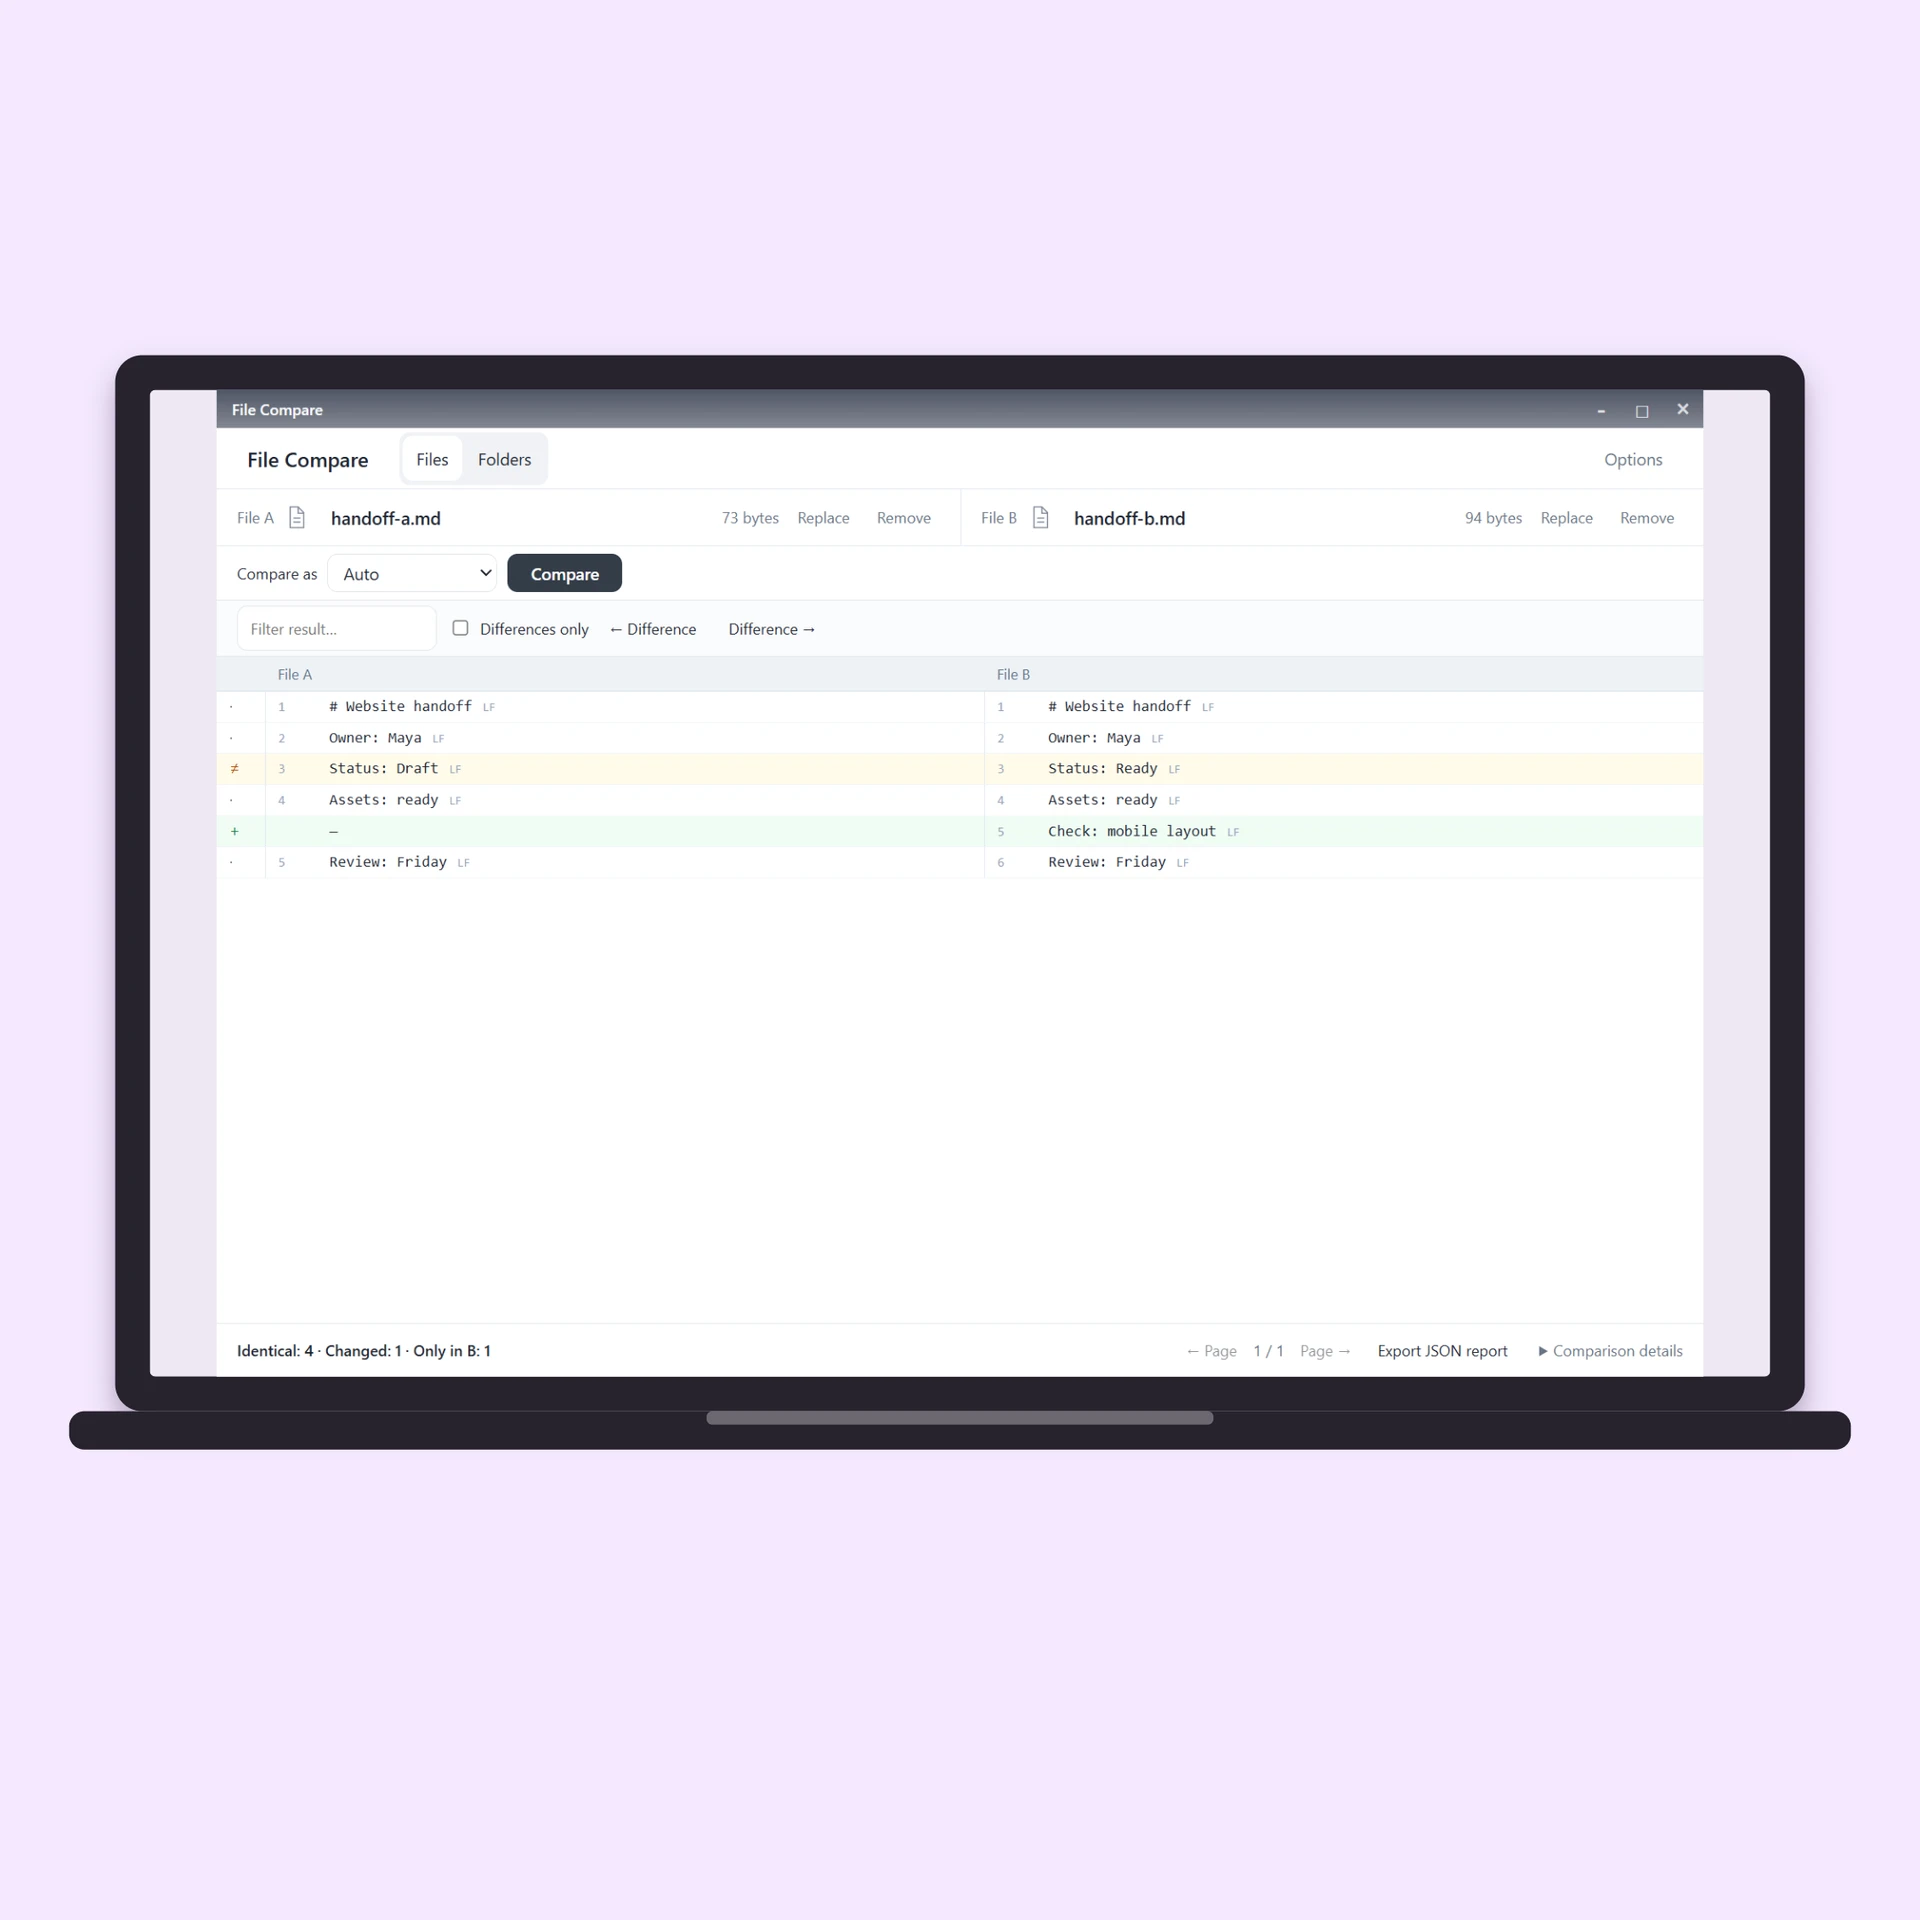
Actual 2160 × 2160 PNG exported from Grid Studio 1.1.1 in a standalone browser preview. The frame is a stylized illustration, not an official hardware render or a photograph.
Keep important controls visible
Select Fit full photo to retain the complete screenshot. The frame's screen and the screenshot may have different proportions, so some unused space can remain. Fill screen / cell fills the screen area but can crop menus or controls along the edges.
Adjust the selected image's Zoom and positioning if necessary. Check the title, important buttons and example result before exporting. A closer crop can make the image more readable, but it should not hide something necessary to understand the feature.
Use Device color, Soft shadow, Background and Outer margin to set the presentation. For a tutorial announcement, a restrained background usually leaves more attention on the screenshot.
Export for the destination
Choose Canvas ratio, Long edge and Format, then select Export image ↓. The example used a square canvas, a 2160-pixel long edge and PNG; the downloaded image was 2160 × 2160 pixels.
Open the saved file at the size it will appear in your post. The mockup frame reduces the space available for the screenshot itself. If text becomes too small, use a closer composition or place the unframed screenshot next to your explanation. A larger export cannot add detail absent from the source.
The current interface accepts PNG, JPEG and WebP, with a 25 MB / 40 MP limit per imported image. JPEG can reduce file size; PNG is useful for interface text and transparent output. Check the actual saved result rather than assuming either format will suit every image.
Use Grid Studio for the presentation image. To understand the app shown in this example, read the text-file comparison walkthrough.