
If you already have a transparent illustration or a finished cutout, you do not need to remove its background again. Sticker Press can take the whole image, add a border and a short caption, and prepare an individual PNG or a sheet of stickers.
This tutorial covers Sticker Press 1.1.0 and starts with an already-transparent image. Background removal is a separate optional workflow; it requires model resources and an edge review.
Start with a transparent image
Open Sticker Press in Aelrox. If needed, download Aelrox first.
Choose Open image, then select a PNG with a transparent background. The app also accepts JPG and WebP, up to 25 MiB, but a normal JPG does not contain transparency. A white rectangle in the source is not the same as an empty background.
For a repeatable starting point, use the 480 × 480 transparent sample badge. It is a purpose-made geometric illustration, not an AI-generated product screenshot.
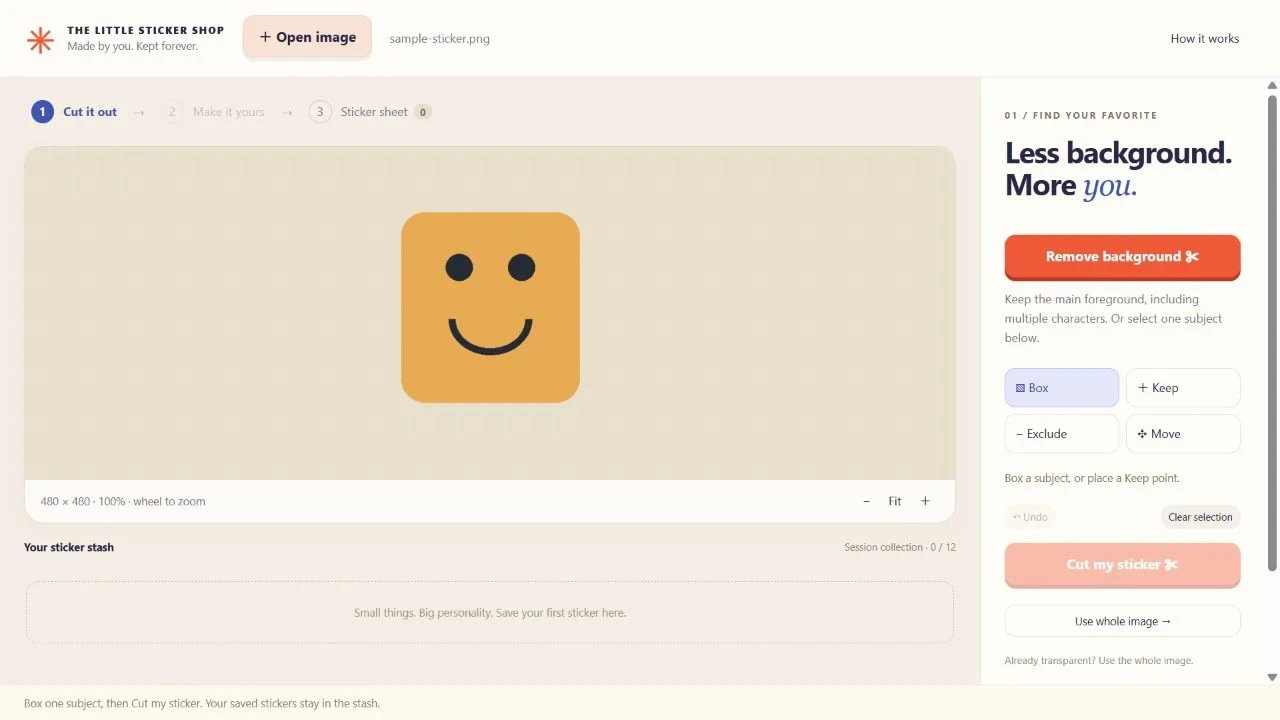
The actual input screen. Use whole image skips segmentation when the source already has transparency.
Choose Use whole image →. In our browser-preview check, this opened the Make it yours stage directly and retained the transparent areas. No segmentation model was used for that step.
Add a border that works at the final size
The Sticker border control changes the outline thickness. The current range is 0–28 pixels. Start modestly, then judge the result at the size where the sticker will actually appear.
In our sample preview, we kept the default 12-pixel white border and entered Ready to review in Say a little something. The caption field accepts up to 40 characters. A short phrase is easier to read on a small sticker than a full sentence.
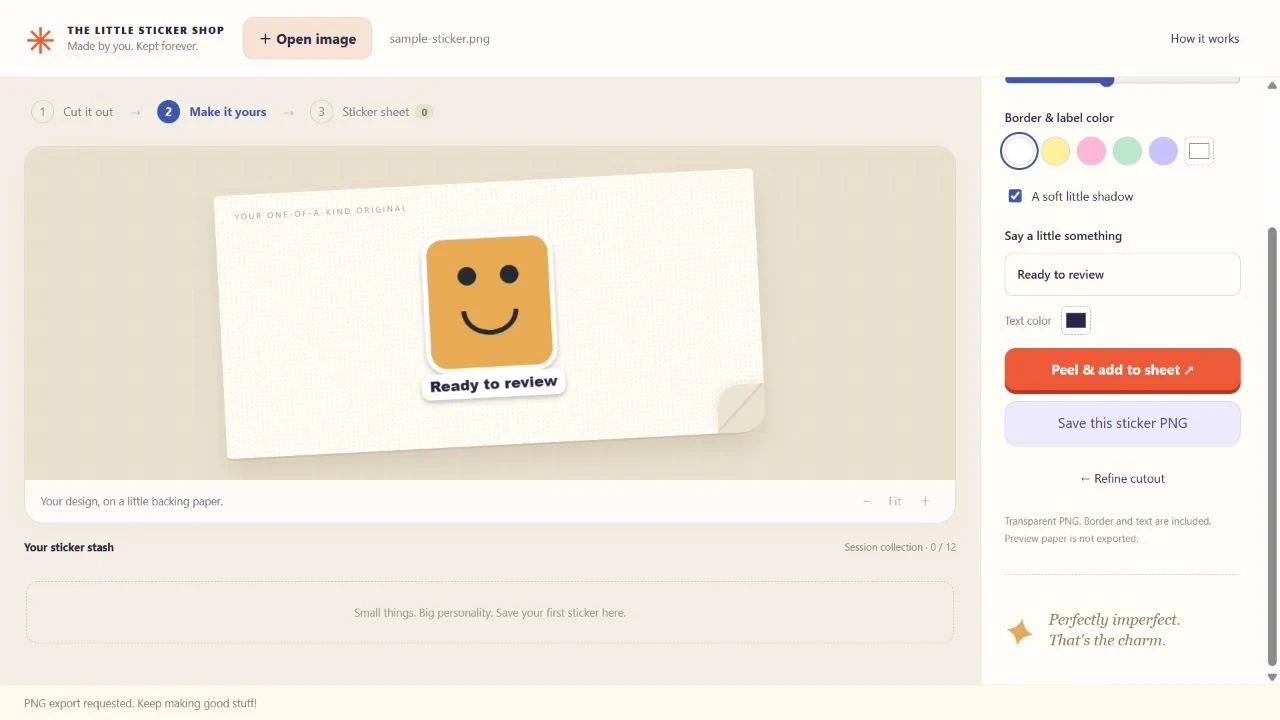
Actual decorated preview using the published app in a local browser run; the individual PNG was also exported and inspected.
Choose a border and label color, set the text color, and decide whether to keep A soft little shadow enabled. The backing paper shown behind the preview is not part of the PNG export.
If the original PNG has a large amount of transparent padding, expect the app to trim the cutout as it prepares the sticker. The cutout's long edge is limited to 900 pixels before decoration; this is a small raster-sticker workflow, not a vector or print-cutting export.
Save one sticker or build a sheet
Use Save this sticker PNG when you only need the individual design. The PNG includes your border and text.
Use Peel & add to sheet ↗ to add a snapshot to the session collection. You can then open another image or make a variation and add another sticker. The collection holds up to 12 snapshots.
Opening a saved sticker for editing creates an editable copy; it does not silently rewrite the snapshot already in the collection. That is useful for making a second caption or color without losing the first design.
The sheet export is a 1800 × 2400 PNG, with background choices including transparency. Check the arrangement before saving. It is an image sheet, not a printer-specific label template, a vector cutting path or a promise about physical print size.
Export before closing
The collection is session-only. Closing the micro-app does not preserve it as a permanent sticker library. Save the individual PNGs or the completed sheet before leaving.
Our illustrated browser run verified the whole-image route, decoration and exported PNG bytes through a local file-output adapter. The saved PNG retained an alpha channel with transparent pixels. This checks the output image, not the Aelrox desktop save dialog.
After saving in Aelrox, open the exported image in the app where you plan to use it and inspect the transparency, caption and edges. For a photo that still needs a cutout, use Sticker Press's selection and review stages first, or prepare the transparent asset in Vision Lab.