A background-removal result can look convincing at a glance while still losing a handle, leaving a gap or keeping part of the surface behind an object. Vision Lab combines automatic foreground removal with selection tools and manual mask brushes, so you can inspect and correct the cutout before saving a transparent PNG.
This workflow covers Vision Lab 1.3.1. Use it for a product photo, an illustration or another image you have permission to edit. The result is a raster cutout; fine hair, translucent material and low-contrast boundaries still need careful review.
Choose whether you need the foreground or one object
Open Vision Lab in Aelrox and import your image. If necessary, install Aelrox first. Follow the model setup prompt before using a model-dependent operation.
For a photograph of two objects on a table, there are two different goals:
| Desired result | Starting method |
|---|---|
| Keep the main foreground, potentially including both objects | Automatic background removal |
| Keep only one object | A box or Keep/Exclude selection |
The automatic operation is not a guarantee that only one object will survive. Decide which result you want before spending time correcting a mask.
For a reproducible example, we used an original 800 × 600 mug illustration with a solid background and tabletop. It is deliberately simple, not a photographic quality benchmark.
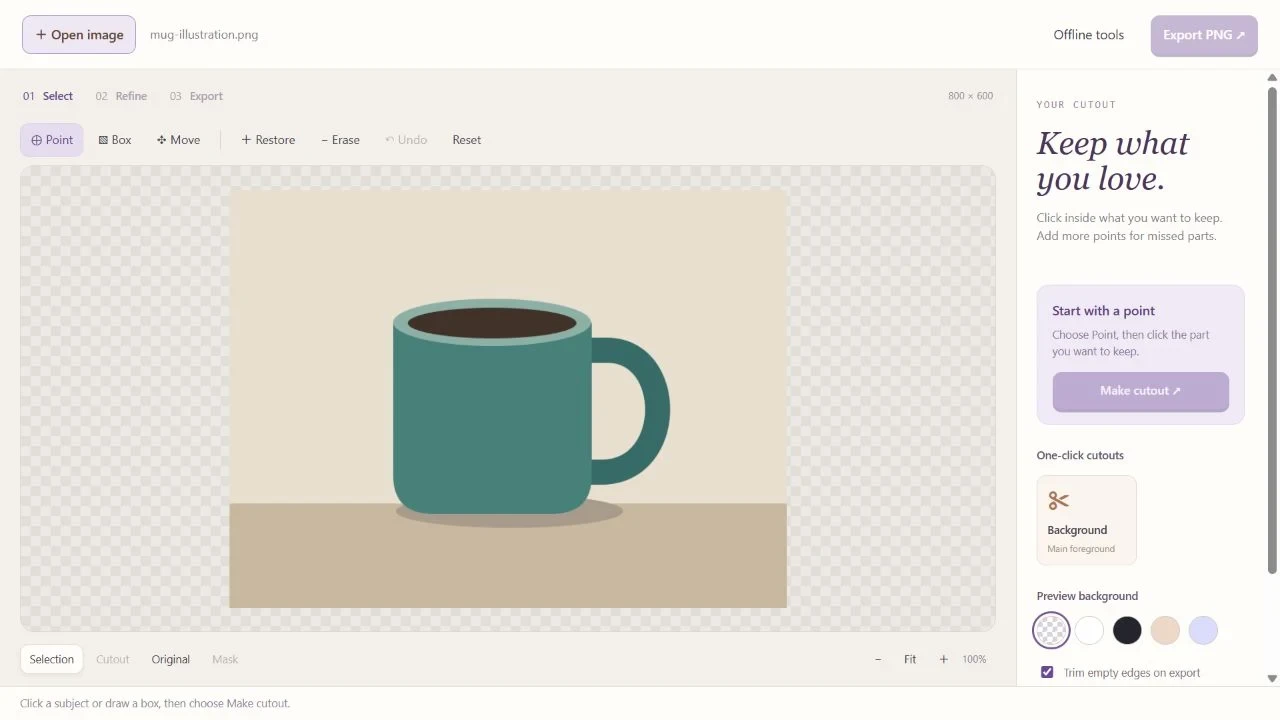
Input in the published app’s browser preview. The illustration contains a handle opening and a shadow.
Make a selection that includes the whole subject
For one object, draw a box around it and use Keep and Exclude points where needed. The box is a clipping boundary: a handle or edge outside it cannot be recovered merely by asking the model to keep the object. Leave enough room for the complete subject.
An almost-full-image box is also ambiguous. In the current version, a box covering more than roughly three quarters of the image requires a Keep point. Place that point on the subject rather than on the background.
In our example, Background ran the actual BiRefNet Lite model and removed the tabletop and space inside the handle. The cup and outer handle remained. Check those regions separately in your own image; a more complex photograph can behave differently.
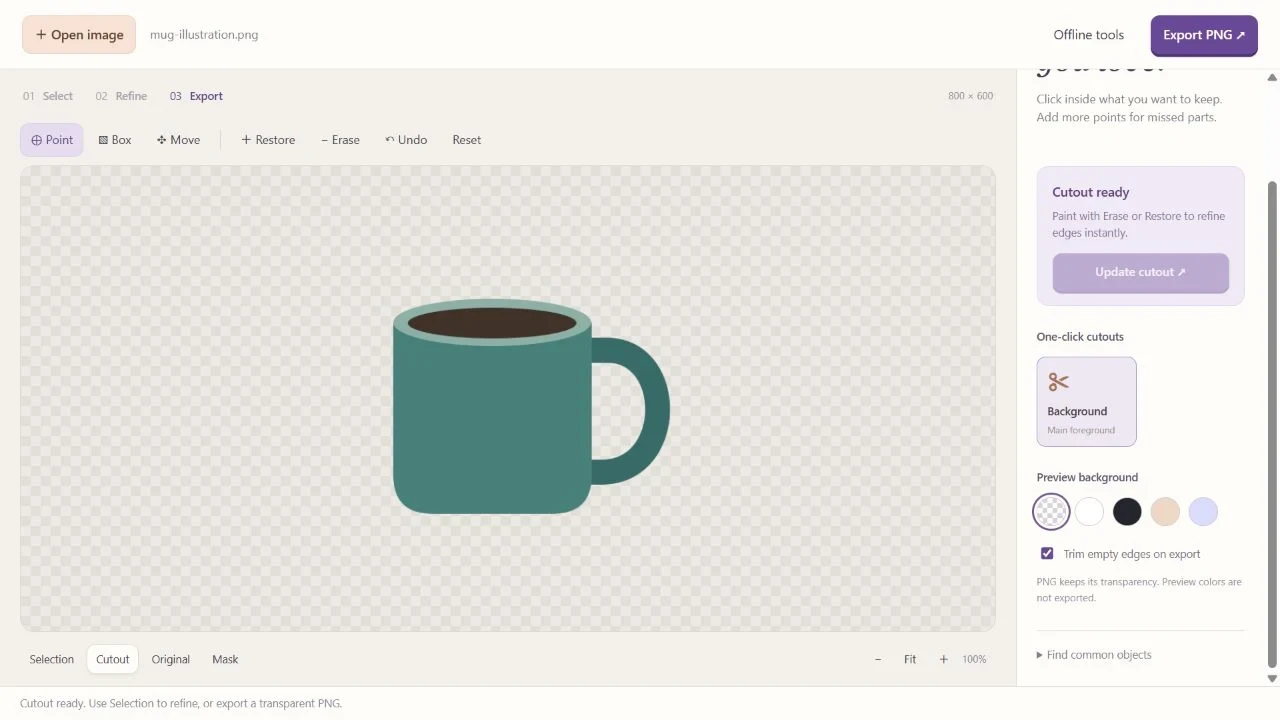
Actual cutout result. The checkerboard is the app’s transparency preview, not a replacement image background.
Inspect the mask before decorating anything
Switch among Original, Selection, Cutout and Mask to understand what is retained. A background color in the preview can help expose missed edges; that preview color is not included in the transparent export.
Use Erase to remove unwanted mask areas and Restore to recover areas that belong to the subject. Choose a smaller brush near narrow details. The current brushes range from 4 to 160 pixels, with undo for the most recent eight brush strokes.
Resolve a pending selection operation before switching to mask cleanup. Keeping selection and brush work separate makes it easier to tell whether the next action replaces the selection or refines the current cutout.
Inspect against both a light and a dark preview background if the cutout will be reused in different designs. Look for pale fringes, clipped details and isolated specks. These checks are more useful than assuming “background removed” means “ready to publish.”
Export a PNG with the framing you need
Choose whether to trim empty edges around the subject, then export PNG. Trimming changes the canvas bounds; it does not add detail to the image.
Vision Lab processes the imported working image at a maximum long edge of 1600 pixels. The export follows that working resolution. If you need a much larger print asset, do not assume this workflow preserves the original camera resolution.
We exported the example and inspected the PNG: its alpha channel included fully transparent and fully opaque pixels. Reopen your saved PNG in its intended destination and check both its edges and its size. Keep the original image separately for any later edit.
Model setup and local processing
The required models are downloaded on demand and can be shared with Sticker Press. Image processing uses the installed local resources. First-time resource downloads are distinct from uploading your image; do not describe the first launch as completely offline.
The illustrated example uses the published UI and the actual local inference worker in a browser evidence setup. It is not a quality comparison against other background removers or a test of the desktop save dialog. For a plain transparent asset, use Vision Lab; for borders, captions and a sticker sheet, continue with Sticker Press.